How to make Homemade Vanilla Ice Cream?
This recipe takes 275 minutes for 6 servings (340 kcal/serving), medium difficulty.
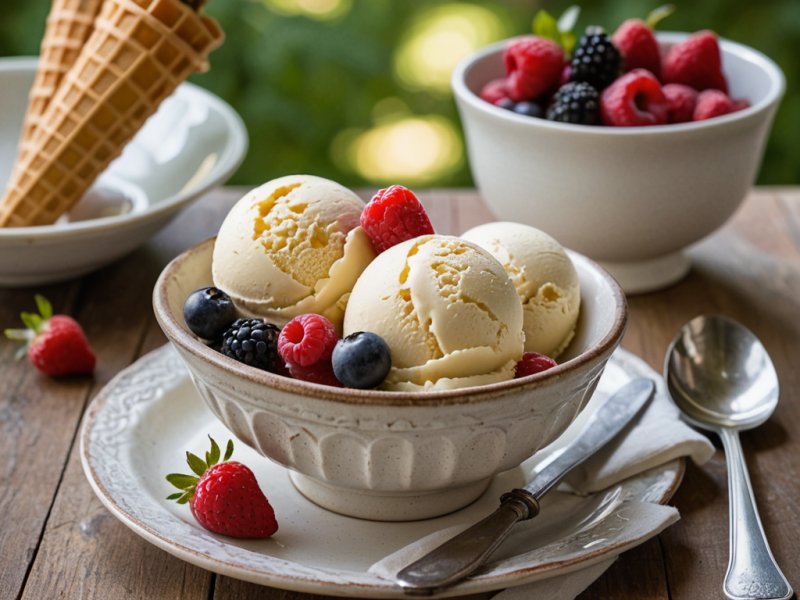
A smooth and creamy homemade vanilla ice cream made with real vanilla bean. No ice cream maker needed, this recipe surpasses any store-bought ice cream and delights both young and old alike.
20 min
Prep time
15 min
Cook time
240 min
Rest
6
Servings
Medium
Difficulty
4h35
Total time
Dessert
Meal type
340
Calories
7g
Proteins
32g
Carbs
21g
Fats
Approximate nutritional values per serving
What ingredients for Homemade Vanilla Ice Cream?
How to prepare Homemade Vanilla Ice Cream?
-
1
Split the vanilla bean lengthwise. Scrape out the seeds with the tip of a knife and set them aside.
-
2
In a saucepan, pour the whole milk and heavy cream. Add the vanilla seeds and the empty pod. Bring to a gentle simmer without boiling, then remove from heat and let steep for 15 minutes, covered.
-
3
In a large bowl, vigorously whisk the egg yolks with the sugar for 3 to 4 minutes, until the mixture turns pale and becomes frothy.
-
4
Remove the vanilla pod from the infused milk. Gradually pour the hot milk over the yolk-sugar mixture, whisking constantly to temper the eggs without cooking them.
-
5
Pour everything back into the saucepan and cook over low heat, stirring constantly with a wooden spatula. The custard is ready when it coats the spatula (about 82-84°C / 180°F). It must never boil.
-
6
Immediately strain the custard through a fine sieve into a cold bowl set over an ice bath. Stir regularly to speed up the cooling. Add the pinch of salt.
-
7
Once the custard is completely cool, pour it into a freezer-safe container. Place in the freezer for 1 hour.
-
8
Remove the container and vigorously stir the ice cream with a fork to break up the crystals. Repeat this every 45 minutes for 3 to 4 hours, about 4 to 5 times total.
-
9
After the final stirring, let the ice cream set completely in the freezer. Remove it 10 minutes before serving for perfect smoothness.
Tips for making Homemade Vanilla Ice Cream?
If you own an ice cream maker, pour the cooled custard directly into the bowl and churn according to your machine's instructions (about 25-30 minutes). The pinch of salt is essential: it enhances the vanilla flavor and balances the sweetness. For an express version, replace the custard with 500 ml of whipped cream mixed with sweetened condensed milk.
Additional information
Homemade vanilla ice cream is a timeless and universally beloved dessert. Far from the often bland and additive-laden industrial versions, a homemade ice cream made with real vanilla is a taste revelation. Smooth, fragrant and enveloping in its sweetness, it brings back memories of the artisanal ice creams of our childhood.
Choosing the Vanilla
Vanilla is the soul of this ice cream, and the choice of bean is crucial. Choose Bourbon vanilla beans from Madagascar, renowned for their rich, woody and slightly caramelized aroma. A good bean should be supple, shiny and oily to the touch — never dry or brittle.
To extract maximum flavor, split the bean lengthwise and scrape out the seeds with the tip of a knife. These thousands of tiny black specks are true concentrates of aroma. Don't throw away the empty pod: steeped in hot milk, it continues to release its precious fragrance.
The Custard Technique
The foundation of any great vanilla ice cream is a perfectly made custard (crème anglaise). This step requires a bit of patience and attention, but it is what gives the ice cream its incredibly smooth texture and incomparably rich taste.
The secret lies in the cooking: the custard must thicken gently without ever boiling. Stir constantly with a wooden spatula, making figure-eight motions, and watch for the coating that forms on the spatula. When a line drawn with your finger across the spatula stays clean and doesn't run, the custard is ready. Strain it immediately through a fine sieve to stop the cooking.
No Ice Cream Maker: No Problem
If you don't own an ice cream maker, don't worry! The manual churning technique yields excellent results. Simply place the cooled custard in a container in the freezer and stir it vigorously with a fork every 30 to 45 minutes for 3 to 4 hours. This regular stirring breaks up the ice crystals and incorporates air, resulting in a smooth and creamy texture.
For an even silkier result, take the ice cream out of the freezer 10 minutes before serving. A scoop of this homemade ice cream in a crispy cone, accompanied by fresh berries or a drizzle of salted caramel, is the perfect summer dessert.
Did you try this recipe?
Give your opinion and help other users!
Community photos
Did you try this recipe?
Frequently asked questions
Preparation takes 20 minutes and cooking takes 15 minutes, for a total of 275 minutes.
This recipe serves 6 people. You can adjust the quantities directly on the page.
This recipe is medium difficulty. It is suitable for cooks with some basic skills.
Per serving: 340 kcal, 7g protein, 32g carbs and 21g fat.


Comments 0
Be the first to comment on this recipe!